When choosing between wired and wireless smart doorbells, consider your home’s existing wiring and power needs. Wired models require connecting to your existing doorbell wiring and transformer, offering continuous power but needing proper installation. Wireless models run on batteries or low-voltage connections, making setup easier but requiring regular charging or battery changes. To guarantee the best fit for your home, you’ll find helpful tips and detailed steps further down.
Key Takeaways
- Wired doorbells connect directly to existing doorbell wiring and chimes, offering reliable power and continuous operation.
- Wireless doorbells run on batteries and connect via Wi-Fi, avoiding wiring but requiring regular battery maintenance.
- Wired installation involves electrical wiring, possibly needing transformer upgrades; wireless setup is simpler and DIY-friendly.
- Consider home wiring compatibility, Wi-Fi strength, and power source availability when choosing between wired and wireless options.
- Wired models generally offer more consistent performance, while wireless models offer greater flexibility and easier installation.
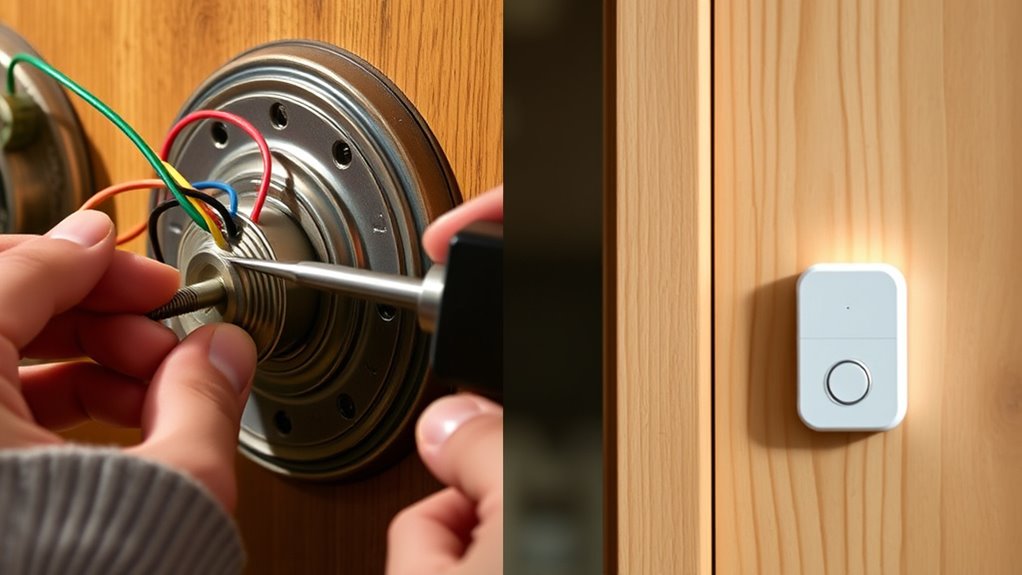
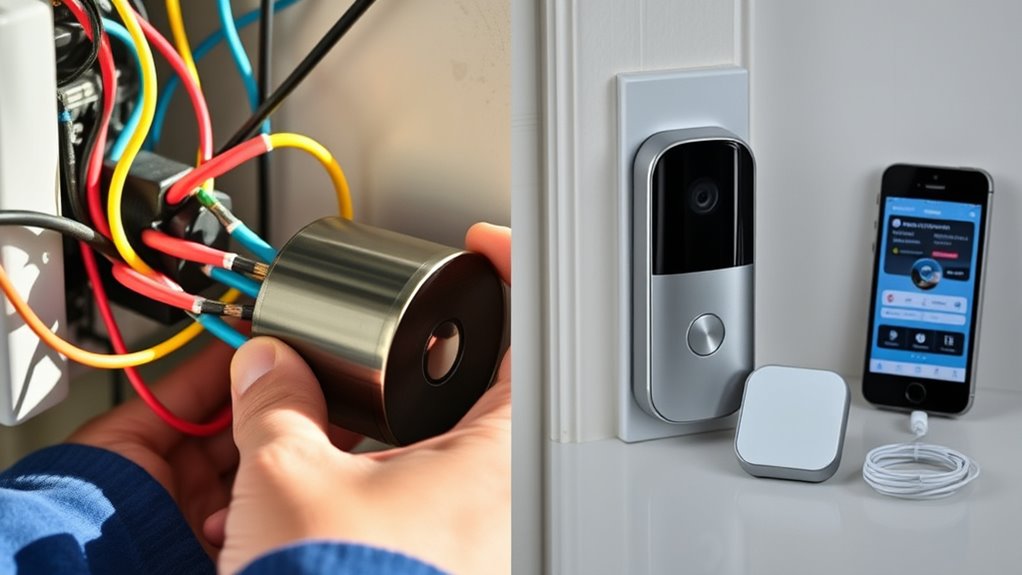
Installing a smart doorbell enhances your home’s security and convenience, but proper setup is vital for ideal performance. When choosing between wired and wireless options, understanding the installation basics will help guarantee your device functions reliably and safely. Wired smart doorbells require a careful approach to wiring and power compatibility. First, you need to check the voltage compatibility, which typically ranges from 16 to 24 volts AC, and ensure the transformer supplies at least 10VA. Before working on the wiring, turn off the power at the breaker to prevent electrical hazards. Installing the doorbell button involves mounting it near your front door at eye level using screws or adhesive, depending on your surface. For wired models, you’ll need to connect the wires guiding them securely to the correct terminals on the chime unit and the doorbell button, securing each with screws. The transformer connects to both the chime and the button, reducing voltage safely for operation. If the existing wiring isn’t compatible, you might need a new transformer or professional help. In contrast, wireless smart doorbells eliminate the need for wiring altogether. Before installation, guarantee the batteries are fully charged or new batteries are installed for proper operation. Mounting the device involves positioning the mounting bracket straight using a level and securing it with screws. Once mounted, the doorbell snaps onto the bracket and is fixed with security screws, which help prevent theft. Connecting a wireless doorbell to your Wi-Fi network is straightforward—simply scan QR codes or manually enter network details using the app. This setup allows you to access live video feeds and receive notifications. Testing the device by pressing the button guarantees that the video feed, audio, and notifications work correctly. When it comes to wiring and compatibility, always verify your existing doorbell wiring voltage with a multimeter before proceeding. If the voltage is below 16V, replacing or upgrading the transformer might be necessary. In wired installations, loop the exposed wire clockwise around the terminal screws for a secure contact. Digital chimes sometimes require jumper wires, whereas mechanical chimes usually do not—check your device instructions. If no existing wiring is present, installing a wired doorbell can become more complex and may require professional assistance. Additionally, power requirements should be carefully considered to ensure your home’s electrical system can support the smart doorbell’s operation, especially for wired models. Wireless models bypass this challenge, but they depend on a stable Wi-Fi connection and regular battery maintenance. For tools, gather screwdrivers, drills, a level, wire strippers, and possibly masonry bits if mounting on brick or concrete. Use drywall anchors for stucco walls and waterproof sealant to protect against moisture. Fully charging batteries before installation and securing the doorbell with security screws are essential steps. If you’re integrating with an existing chime box, locate the chime inside your home and connect the new chime kit to the front and transformer terminals, ensuring all connections are tight.
Frequently Asked Questions
Can I Install a Smart Doorbell Without Existing Wiring?
Yes, you can install a smart doorbell without existing wiring by choosing a battery-operated model. You just need to fully charge its battery, mount it within Wi-Fi range, and connect it to the app and Wi-Fi network. No wiring is necessary, making installation simple and quick. Just make certain the location has a strong Wi-Fi signal for smooth operation and that you regularly recharge or replace the batteries as needed.
What Is the Battery Life Expectancy for Wireless Doorbells?
Imagine your wireless doorbell as a busy bee gathering nectar; its battery life depends on how much it works. Typically, you can expect 6–12 months from a full charge under moderate use. But if you’re constantly checking live view or there’s high traffic, it might need a recharge every 1–2 months. Environmental factors and activity levels can shorten or extend this time, so watch your usage carefully.
Are Wireless Doorbells More Secure Than Wired Versions?
You might wonder if wireless doorbells are more secure than wired ones. While wireless models offer easy installation and flexibility, they’re more vulnerable to hacking, signal interference, and tampering. Wired doorbells, on the other hand, provide constant power and a secure physical connection, reducing risks. To keep either system safe, guarantee strong Wi-Fi security for wireless models and professional installation for wired ones.
How Do I Troubleshoot Power Issues With Wired Doorbells?
They say a problem shared is a problem halved, so start troubleshooting your wired doorbell by checking the transformer’s voltage with a multimeter—16-24V is normal. Make certain all wiring is secure, insulated, and undamaged. Test the chime’s compatibility and replace it if needed. Inspect connections for loose or frayed wires, and verify the power supply. Addressing these issues promptly keeps your doorbell ringing smoothly, just as you expect.
Is Professional Installation Recommended for Wired Systems?
You should definitely consider professional installation for wired systems. Professionals have the expertise to handle electrical wiring safely and make certain everything is connected correctly. They can make sure your doorbell complies with local codes and integrates seamlessly with your existing smart home setup. Plus, they’ll do a tidy job, saving you time and frustration. Overall, hiring pros guarantees a reliable, safe, and aesthetically pleasing installation.
Conclusion
Whether you choose wired or wireless, installing a smart doorbell boosts your home’s security and convenience. Did you know that over 60% of homeowners report feeling safer after installing a smart doorbell? Whichever option you pick, guarantee it’s properly installed to maximize its benefits. With the right setup, you’ll enjoy real-time alerts and clearer video footage, making your home smarter and more secure. So, go ahead—upgrade your doorbell today for peace of mind tomorrow.