
To save time on every project, organize your garage with wall-mounted racks, pegboards, and labeled storage for quick tool access. Improve lighting with bright overhead and task lights to reduce errors and eye strain. Optimize your layout by placing workbenches and tools within arm’s reach, creating dedicated zones for different tasks. Keep your workspace clean and well-maintained to prevent delays. Follow these steps, and you’ll discover more ways to boost your efficiency—keep going!

Get home appliances delivered free with Prime
- Fast, free delivery on millions of items
- Prime Video, Amazon Music and more included
- Member-only deals all year
Key Takeaways
- Implement a systematic tool organization system with labeled storage for quick access and reduced search time.
- Upgrade to bright, even lighting with task-specific fixtures to improve visibility and reduce errors.
- Optimize layout by positioning frequently used tools and work zones to minimize unnecessary movement.
- Use sturdy, spacious work surfaces and ergonomic setups to enhance comfort and efficiency.
- Maintain regular cleanliness and equipment upkeep to prevent delays and ensure a safe, productive workspace.
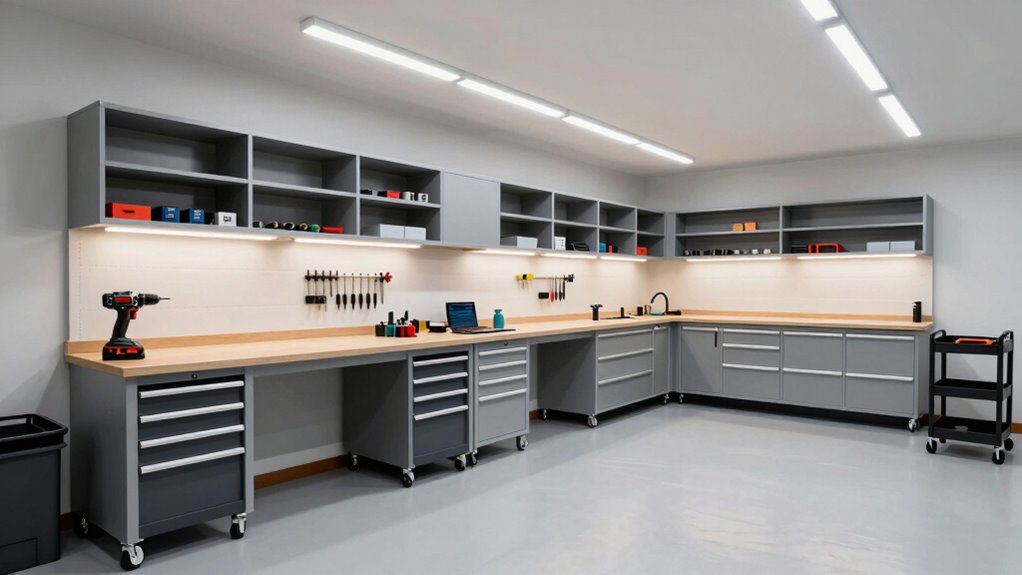
Upgrading your garage workshop can transform it into a more efficient and enjoyable space, but knowing where to start can be overwhelming. The first step is to focus on organizing your tools, especially your power tools. Proper power tool organization isn’t just about keeping things tidy; it’s about creating a system that makes every project smoother. Invest in wall-mounted racks, pegboards, or dedicated storage bins for your drills, saws, and sanders. When your tools are stored logically and within easy reach, you spend less time rummaging and more time working. Labeling storage areas can further speed up your workflow, ensuring you always know where each tool belongs and can grab it quickly.
Organize your tools with racks, pegboards, and labels to streamline projects and save time.
Once your power tools are well-organized, turn your attention to lighting improvements. Good lighting is essential for precision and safety, especially when working with small parts or intricate cuts. Bright, evenly distributed light reduces eye strain and helps you see details clearly. Consider installing overhead LED fixtures that provide broad illumination without harsh shadows. Task lighting, such as adjustable workbench lights, can be added to focus light exactly where you need it most. Upgrading your lighting might seem minor, but it can substantially cut down on mistakes and rework, saving you time on every project. Incorporating proper lighting placement ensures optimal visibility and efficiency.
As you improve your workshop, don’t forget about workflow. Position your workbenches and storage units thoughtfully to minimize movement and streamline your process. Keep frequently used tools and materials within arm’s reach, and create dedicated zones for different tasks, like cutting, assembling, and finishing. This layout reduces clutter and makes progression between steps faster, so you spend less time setting up and more time creating. It’s also beneficial to consider workflow efficiency when designing your space to maximize productivity. Additionally, integrating ergonomic features can enhance comfort and reduce fatigue during long work sessions. Ensuring your workspace is adaptable can further support different projects and workflows, making your entire process more seamless.
Another key upgrade is your work surface. A sturdy, spacious workbench encourages more efficient work and reduces fatigue. Add a protective mat or a non-slip surface to keep materials steady and prevent accidents. When your workspace is comfortable and functional, you’ll find it easier to stay focused and productive. Regularly maintaining your work surface and tools can also prevent delays caused by equipment failure or safety hazards. Keep in mind that proper maintenance prolongs the lifespan of your tools and workspace, maintaining efficiency over time.
Finally, keep your space clean and maintained. Regularly clearing away dust, debris, and clutter prevents delays caused by searching for tools or sorting through messes. A well-maintained workshop feels inviting and motivates you to keep things organized and efficient. All these upgrades—power tool organization, lighting improvements, workspace layout, and cleanliness—combine to create a workshop that saves you time on every project, allowing you to enjoy your craft without frustration.
Products Worth Considering

Philips Hue Festavia 65-Foot Smart LED String Lights, 250 Color-Changing Mini LEDs

Google Nest Learning Thermostat (3rd Gen), Stainless Steel, with 3 Temperature Sensors and elago Wall Plate

Philips Hue Festavia Outdoor Globe String Lights, 8 Bulbs, 22 ft
As an affiliate, we earn on qualifying purchases.
Frequently Asked Questions
What Is the Recommended Budget for a Garage Workshop Upgrade?
You should budget around $1,000 to $3,000 for a garage workshop upgrade. Focus on storage solutions to maximize space and organization, which can cost between $200 and $800. Don’t forget lighting improvements, which enhance visibility and safety, typically costing $100 to $500. Prioritize your needs and gradually upgrade, ensuring you get quality solutions that save time on every project without overspending.
How Long Does Each Upgrade Phase Typically Take?
Typically, each upgrade phase takes about one to two weeks. For example, if you focus on installing storage solutions first, it might take you a week to organize and set up. Lighting improvements may follow in another week, ensuring your workspace is well-lit for projects. By breaking it down, you save time overall—so plan each phase carefully, dedicating enough time for quality installation and testing.
Can DIYERS Complete These Upgrades Without Professional Help?
Yes, you can complete these upgrades yourself, but you need to prioritize DIY safety and proper tool maintenance. Follow safety guidelines, wear protective gear, and take your time to avoid accidents. Regularly inspect and maintain your tools to guarantee they work efficiently. While some upgrades might be straightforward, don’t hesitate to seek professional help for complex tasks to keep your workspace safe and effective.
Which Tools or Equipment Are Essential for Starting the Upgrade?
Think of your garage as a canvas; the right tools are your brushes. To start your upgrade, you’ll need essential equipment like sturdy storage solutions to organize your space and efficient lighting improvements to brighten your projects. A cordless drill, screwdrivers, and a level are must-haves. These tools help you transform chaos into order, making every project smoother and faster. With them, your garage becomes a workspace you’re proud of.
How Do I Prioritize Upgrades Based on My Project Types?
You should prioritize upgrades based on your project types by focusing on storage organization and lighting improvements first. If your projects need clear visibility, upgrade lighting to reduce eye strain and increase precision. For frequent tool access, improve storage organization with shelves or cabinets to save time searching. Balancing these upgrades guarantees your workspace is efficient and tailored to your specific projects, speeding up your workflow and reducing frustration.
Conclusion
By following these upgrade steps, you’ll find your garage workshop becomes more efficient and enjoyable, almost as if the space itself is working with you. It’s funny how small improvements can lead to big savings in time and effort, turning every project into a smoother experience. Sometimes, the best upgrades seem to happen just when you least expect it—like a coincidence that transforms your entire workflow. Embrace these changes, and watch your projects flourish effortlessly.