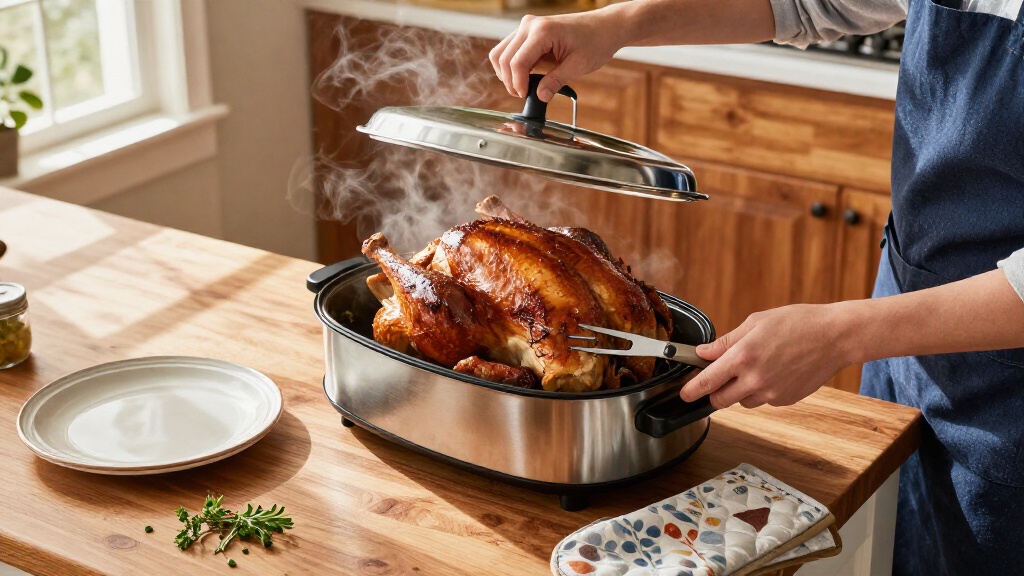
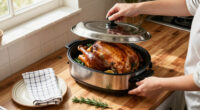
Use an electric turkey roaster to cook a whole turkey, then check the meat with a food thermometer before serving. This guide is for beginners who have a roaster and want practical steps for preparation, cooking, and safe doneness checks. Allow about 3–5 hours, including preparation and resting; the actual cooking time varies with the turkey and appliance.

Get home appliances delivered free with Prime
- Fast, free delivery on millions of items
- Prime Video, Amazon Music and more included
- Member-only deals all year

28-Quart Stainless Steel Electric Roaster Oven with Self-Basting Lid
- ✔ Capacity: 28 quarts
- ✔ Temperature range: 150°F–450°F
- ✔ Wattage: 1450 watts
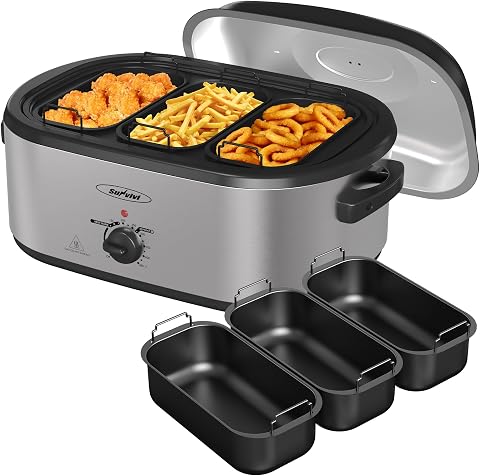
Sunvivi 24-Quart Electric Roaster Oven with 3-Tray Buffet Server
- ✔ Capacity: 24 quarts
- ✔ Temperature range: 150°F–450°F
- ✔ Wattage: 1450 watts

SUNVIVI 24-Quart Electric Roaster Oven with 3 Buffet Trays
- ✔ Capacity: 24 quarts
- ✔ Maximum turkey capacity: 28 pounds
- ✔ Temperature range: 150°F–450°F
Difficulty: Beginner | Time: 3–5 hours, depending on turkey size
What You’ll Need
Tools & Materials:
- Electric roaster with lid and roasting rack
- Food thermometer that can check the thickest parts of the turkey
- Roasting pan or tray for handling the turkey
- Cutting board and carving knife
- Paper towels
- Oven mitts
Knowledge:
- Basic handwashing and raw-poultry handling
- How to read a food thermometer
Check the roaster’s manual for its maximum turkey size, setup, and cooking guidance. Thaw the turkey completely in the refrigerator before cooking; never cook a frozen or partly frozen whole turkey in the roaster. Keep raw turkey separate from ready-to-eat food.
28-Quart Stainless Steel Electric Roaster Oven with Self-Basting Lid
This is the strongest all-around choice for cooks who want a roomy electric roaster that can also cover several secondary jobs. At 28 quarts, it has the largest stated capacity in this group, and its controls include defrost and warm along with roasting, baking, and slow cooking. That range makes it more versatile than either 24-quart Sunvivi option, both of which emphasize the buffet setup.The 150°F–450°F thermostat gives us a broad range for different cooking tasks, while the self-basting visible lid is designed to circulate heat and moisture. A removable pan and rack also make it easier to lift out the cooked bird and clean the roasting area. The anti-scald handles are a useful touch when a heavy, hot vessel needs moving.Its main disadvantage is practical: the listed 27-by-22-by-23-inch dimensions demand substantial counter and storage space. It also has no buffet trays, so the Sunvivi models are better equipped for keeping several sides warm at the table. Choose this one when cooking capacity and multiple functions matter more than a coordinated serving station; skip it if compact storage or buffet service is central to your plan.
Pros:
- Largest stated capacity in this comparison at 28 quarts.
- Defrost and warm settings join roasting, baking, and slow cooking.
- Removable pan and rack support serving and cleanup.
- Anti-scald handles and a visible self-basting lid add practical handling features.
Cons:
- Its 27 × 22 × 23-inch listed footprint needs ample counter and storage room.
- No buffet trays are included for warming sides during serving.
Best for: Cooks who want the largest listed capacity, multiple cooking modes, and a roaster that can handle more than turkey day.
Not ideal for: Households short on counter or storage space, or hosts who want included trays for serving side dishes.
Bottom line: We recommend this as the most versatile pick when capacity and cooking modes outweigh its large footprint and lack of buffet trays.
“We recommend this as the most versatile pick when capacity and cooking modes outweigh its large footprint and lack of buffet trays.”
Sunvivi 24-Quart Electric Roaster Oven with 3-Tray Buffet Server
For a holiday meal where the sides need attention too, this 24-quart roaster makes the most practical case. Its three buffet trays turn the appliance into a small warming station, which the larger 28-quart model cannot do with its included accessories. The 150°F–450°F thermostat and self-basting lid retain the core roasting features found across this lineup.The removable enamel roasting pan and buffet trays are listed as dishwasher safe, easing cleanup after a multi-dish meal. Its listed dimensions are 10 inches deep, 25 inches wide, and 17 inches high, a different profile from the 28-quart unit; we should still measure our storage space because the 25-inch width is substantial. The listing describes an aluminum body, unlike the stainless-steel material stated for the other Sunvivi model.This pick suits hosts who prioritize keeping side dishes warm and want serving pieces included. It does not have the 28-quart volume or the explicit 28-pound turkey capacity claim found elsewhere in this comparison. The care instructions also call for avoiding steel wool on the coating and drying the unit after washing to help prevent rust, while the exterior must be wiped clean. That extra care makes it less carefree than the dishwasher-safe removable components might first suggest.
Pros:
- Three buffet trays help keep several sides warm for serving.
- Adjustable 150°F–450°F temperature control and self-basting lid.
- Removable enamel pan and buffet trays are listed as dishwasher safe.
- Anti-scald handles support safer handling.
Cons:
- At 24 quarts, it has less stated volume than the 28-quart option.
- Exterior needs wiping, and the coating requires gentle cleaning and thorough drying.
Best for: Hosts who want a roaster and a three-tray warming setup in one appliance for a meal with several side dishes.
Not ideal for: Buyers who need the largest stated capacity, a confirmed maximum turkey weight, or an exterior that can go in the dishwasher.
Bottom line: We favor this model for buffet convenience and removable parts that can go in the dishwasher, provided its 24-quart capacity meets our needs.
“We favor this model for buffet convenience and removable parts that can go in the dishwasher, provided its 24-quart capacity meets our needs.”
SUNVIVI 24-Quart Electric Roaster Oven with 3 Buffet Trays
This option stands apart from the other 24-quart roaster because its listing names a maximum turkey capacity of 28 pounds. That gives buyers a more concrete fit reference than the B0D3QGXNXN listing provides. It also includes three buffet trays and a divider pan, so it keeps the side-dish service advantage of its Sunvivi counterpart while pairing it with an explicit bird-size claim.Its 150°F–450°F thermostat, self-basting dome lid, lift-out rack, and removable enamel pan cover the same basic roasting needs as the other two models. The listed body material is stainless steel, whereas the B0D3QGXNXN listing says aluminum. Both share model number ZER01X, so those differences may reflect listing variations; confirm the exact finish and included parts with the seller before relying on them.The tradeoff is that 24 quarts remains below the 28-quart capacity of our top pick, and this listing gives dimensions of 12 × 25 × 17 inches. Its extra listed depth over the other Sunvivi version may affect a tight counter or cabinet. The enamel pan also means a stainless-steel exterior does not make every cooking surface stainless steel. Choose it when the stated turkey limit and buffet accessories fit your plan; choose the 28-quart unit for more volume and broader cooking functions.
Pros:
- Listing states capacity for a turkey up to 28 pounds.
- Three buffet trays and a divider pan support side-dish service.
- Removable enamel pan and trays are listed as dishwasher safe.
- Adjustable thermostat and self-basting lid cover core roasting needs.
Cons:
- Its 24-quart capacity is lower than the 28-quart model.
- Listed 12-inch depth and 25-inch width still require significant space.
- The enamel roasting pan is not stainless steel, despite the listed stainless-steel material.
Best for: Buyers who want three warming trays and a roaster listing that explicitly states it fits a turkey up to 28 pounds.
Not ideal for: Those who need more than 24 quarts, want the broadest listed cooking modes, or cannot verify the material and dimensional listing details.
Bottom line: We choose this Sunvivi when its stated 28-pound bird capacity and buffet accessories are the priority, after confirming the listing details.
“We choose this Sunvivi when its stated 28-pound bird capacity and buffet accessories are the priority, after confirming the listing details.”
As an Amazon Associate we earn from qualifying purchases.
Before You Start
Place the roaster on a stable, heat-resistant surface with open space around it. Keep it away from walls, curtains, and water. Do not use an extension cord unless the appliance maker specifically permits it. Wash your hands and clean surfaces that touch raw turkey. Plan for the turkey to rest before carving, and keep a thermometer available: time estimates alone cannot confirm safe doneness.
Step-by-Step Instructions
Step 1: Thaw the turkey completely
Thaw the turkey in its original wrapping on a tray in the refrigerator. Allow about 24 hours for each 4–5 pounds (1.8–2.3 kg). Keep the tray on a low shelf so drips cannot reach other food. Once thawed, cook the turkey within 1–2 days.
Tip:If the turkey is still icy in the cavity or joints, continue thawing in the refrigerator. Do not thaw it on the counter.
Check: The turkey feels flexible, and no ice remains inside the cavity or around the joints.
Step 2: Prepare the roaster
Set the removable cooking pan and rack into the roaster as directed by the manual. Keep the appliance unplugged while arranging its parts. Add water only if the manual calls for it; many electric roasters cook without added liquid. Plug in the roaster and preheat it to the temperature specified by the manual, commonly 325°F (163°C).
Tip:Do not put the turkey directly on the heating element or block vents. The pan and rack must be seated correctly.
Check: The roaster is stable, its parts are in place, and it has reached the instructed cooking temperature.
Step 3: Season and position the turkey
Remove the wrapping and take out the neck and giblets from the body and neck cavities. Pat the turkey dry with paper towels. Season it as desired, then place it breast-side up on the rack. Tuck the wing tips under the bird if they extend outward. Leave the cavity empty or add only loose aromatics, such as onion or herbs; do not pack it with stuffing.
Tip:Wash your hands, utensils, and surfaces after contact with raw turkey. Do not rinse the bird, since splashing can spread germs.
Check: The turkey sits securely on the rack with the cavity clear of the neck and giblets and the lid able to close.
Step 4: Start cooking and keep the lid on
Use oven mitts to lower the turkey and rack into the hot cooking pan. Close the lid and set a timer using the manual’s cooking chart as a planning estimate. Keep the lid closed during cooking; lifting it releases heat and can extend the cooking time. Avoid adding liquid unless the manual recommends it.
Tip:Roaster cooking times vary by model, turkey shape, and starting temperature. Treat the chart as an estimate, not proof of doneness.
Check: The lid is fully closed, the appliance is operating at the instructed setting, and the turkey is cooking without the roaster being disturbed.
Step 5: Check the turkey’s temperature
When the estimated cooking time is nearly reached, open the lid carefully, directing steam away from your face and hands. Insert a food thermometer into the thickest part of the breast and the innermost part of the thigh without touching bone. Check the innermost part of the wing as well. The turkey is safe when each checked area reaches at least 165°F (74°C).
Tip:If any area is below 165°F (74°C), close the lid and continue cooking. Recheck that area after a short interval with a clean thermometer probe.
Check: The breast, thigh, and wing readings are all at least 165°F (74°C).
Step 6: Rest and carve the turkey
Turn off and unplug the roaster. Using oven mitts and sturdy utensils, transfer the turkey to a clean cutting board or tray. Let it rest for at least 20 minutes before carving so the meat is easier to cut and juices can settle. Carve with a clean knife and serve promptly.
Tip:Use a tray large enough to catch juices, and keep the hot roaster pan away from the table edge.
Check: The turkey has rested, cuts cleanly, and shows no undercooked areas. Keep cooked turkey hot until serving, or refrigerate it within 2 hours.
Common Mistakes to Avoid
- Starting with a partly frozen turkey, which can cook unevenly. — Thaw it fully in the refrigerator and check the cavity and joints for ice before cooking.
- Relying on the cooking chart or browned skin to judge doneness. — Check the breast, thigh, and wing with a food thermometer; all must reach 165°F (74°C).
- Opening the lid repeatedly to baste or check progress. — Keep the lid closed until the estimated cooking time is nearly reached, then use the thermometer.
- Packing the cavity with stuffing or aromatics. — Cook stuffing separately and keep any aromatics loose so heat can circulate.
Troubleshooting
Problem: The turkey is not at 165°F (74°C) when the estimated time ends.
Solution: Close the lid and continue cooking. Check the coolest area again after a short interval, keeping the thermometer away from bone.
Problem: The lid does not close over the turkey.
Solution: Do not force it or operate the roaster with the lid ajar. Check the manual’s capacity limit and use a smaller turkey or another appropriate cooking appliance.
Problem: The turkey browns unevenly or the breast looks pale.
Solution: Use temperature readings, not color, to judge doneness. Follow the manual’s guidance for browning; some roasters brown less than an oven.
Problem: The roaster stops heating or its indicator changes unexpectedly.
Solution: Turn it off and unplug it if safe to do so. Check that the outlet and controls are set as instructed, then consult the manual. Do not use the appliance if its cord, plug, or housing is damaged.
What Success Looks Like
The turkey is fully thawed, cooked in a properly set up roaster, and registers at least 165°F (74°C) in the thickest breast and innermost thigh and wing. After resting, it carves cleanly. Serve it promptly or refrigerate leftovers within 2 hours.
Next Steps
Refrigerate leftover turkey in shallow containers within 2 hours, and use it within 3–4 days or freeze it for longer storage. Unplug the roaster and let it cool fully before cleaning the pan, rack, and lid according to the manual. Store the appliance dry, and note the turkey’s weight and cooking time to help plan your next meal.
Frequently Asked Questions
Can I cook a frozen turkey in an electric roaster?
No. Thaw a whole turkey completely in the refrigerator before cooking so it can heat evenly and reach a safe temperature throughout.
Should I add water to the roaster?
Only if the appliance manual instructs you to. Many electric roasters do not need added water, and liquid can affect the cooking method.
How long does a turkey take in an electric roaster?
Time depends on the bird’s size, shape, starting temperature, and roaster model. Use the manual’s chart as an estimate and confirm doneness with a food thermometer.
Can I stuff a turkey before roasting it?
Cooking stuffing separately is simpler and helps the turkey cook evenly. If you do cook stuffing inside the bird, the center of the stuffing must also reach 165°F (74°C).
Does the turkey need to rest after roasting?
Yes. Rest it for at least 20 minutes before carving. The rest makes carving easier; use thermometer readings taken during cooking to verify safe doneness.