Before buying a mini split, make sure your space can support it. Check that the indoor unit blends with your decor and has proper clearance for airflow and maintenance. Pick an outdoor location away from direct sunlight, wind, and debris for maximum performance. Confirm your electrical system can handle the load, and make sure refrigerant and drainage lines are routed correctly to prevent leaks. Keep these deal-breakers in mind—more tips await if you keep going.
Key Takeaways
- Ensure the indoor unit placement allows adequate clearance, structural support, and minimal noise disturbance.
- Select an outdoor location shaded, level, and protected from debris and extreme weather for optimal performance.
- Confirm your electrical system can handle the additional load and consider a dedicated circuit if necessary.
- Maintain unobstructed airflow around vents and regularly clean filters and accessories for efficiency.
- Properly route and insulate drain and refrigerant lines, avoiding kinks, damage, and freezing areas to prevent leaks.
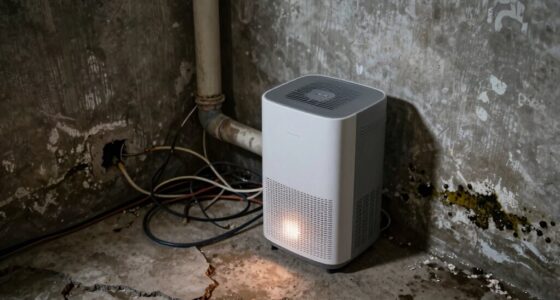
Is Your Home Ready for a Mini Split? Check Space and Support

Before installing a mini split, you need to make certain your home has enough space and proper support for the unit. The indoor air handler should blend seamlessly with your interior aesthetics, so consider where it will look best without disrupting your decor. Confirm there’s enough clearance around the unit for proper airflow and maintenance. Support is equally essential; the wall must be sturdy enough to hold the weight of the indoor unit securely. Additionally, think about noise levels. A well-installed mini split minimizes operational noise, so choose a spot away from bedrooms or quiet spaces where sound could be disruptive. Proper placement ensures your system runs efficiently while maintaining a sleek look and peaceful environment. Ensuring your wall is free from obstructions and has proper mounting solutions can help secure the unit effectively. Also, verify that the wall has adequate structural support to bear the weight of the indoor component safely. Considering installation guidelines can prevent future issues and ensure optimal performance. Checking that the support structure is adequately reinforced will help avoid potential damage or safety hazards over time. Additionally, consulting professional installers can often provide valuable insights into the specific requirements for your home’s layout.
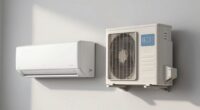
Where’s the Best Spot for the Outdoor Unit? Avoid Sun and Wind
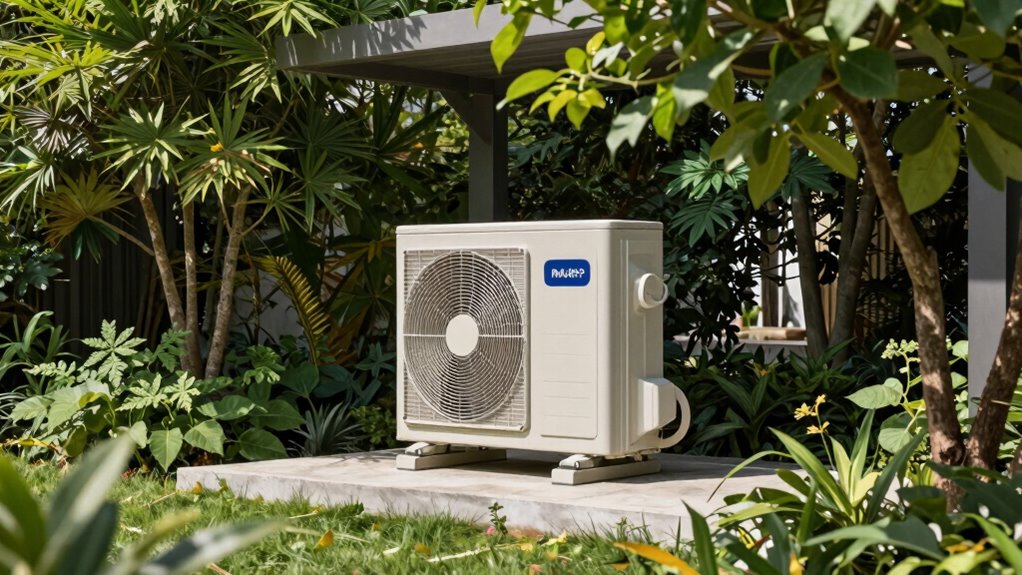
Choosing the right spot for your outdoor unit is crucial to guarantee peak performance and longevity. Proper outdoor placement means avoiding areas with direct sun exposure, which can cause the unit to overheat and work harder. Find a shaded spot or install a sunshade if necessary. Additionally, steer clear of locations exposed to strong wind, as it can disrupt airflow and reduce efficiency. Keep the unit away from debris, foliage, and obstructions that may block airflow or cause damage. A level surface is essential to prevent vibrations and noise. Remember, the outdoor unit needs good airflow and protection from harsh elements. Selecting a location that minimizes exposure to extreme weather conditions will help preserve its lifespan. Ensuring adequate airflow and ventilation is also vital to ensure proper heat dissipation. Proper outdoor placement also involves considering air quality factors, such as avoiding areas with high pollution or airborne debris, which can negatively impact the unit’s performance. Additionally, choosing a location with good drainage can prevent water accumulation and potential damage. Taking the time to select an ideal location now will save you trouble and money down the line.
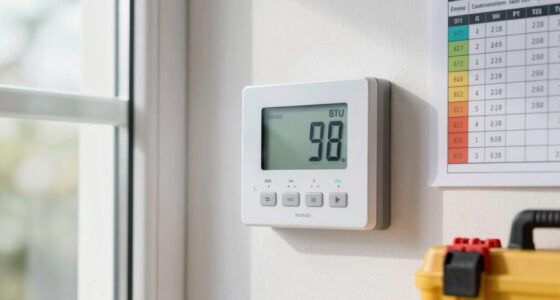
Do You Have Sufficient Electrical Power for the System?
Ensuring your home has enough electrical capacity is vital before installing a mini split system. Without proper power requirements, your system might underperform or cause electrical issues. Check if your electrical panel can handle the additional load. Here are key points to consider:
- Verify the total electrical capacity of your main panel.
- Confirm if your system needs a dedicated circuit.
- Ensure your wiring meets the mini split’s power requirements.
- Consult an electrician if upgrades are necessary.
- Consider electrical safety to prevent potential hazards during installation. Additionally, evaluating your home’s electrical capacity can help identify if your current system can support the new installation without overloading. A thorough power assessment can reveal whether your existing electrical system is sufficient for the mini split’s demands.
Failing to meet the electrical capacity can lead to tripped breakers or system failure. It’s important to evaluate your home’s power supply now, so you avoid costly modifications later. Proper electrical setup guarantees your mini split runs efficiently and safely.
How Can You Ensure Good Airflow and No Obstructions?

Having sufficient electrical power is just the first step; proper airflow and clear space around your mini split are essential for ideal performance. Ensuring there are no airflow obstructions involves careful vent placement and keeping the area free from clutter. Obstructions block airflow, reducing efficiency and causing potential system strain. Proper vent placement directs airflow where it’s needed most, avoiding blocked pathways. Use the following table to understand the importance of clear spaces and vent positioning:
| Consideration | Impact |
|---|---|
| Free space around vents | Prevents airflow obstructions |
| Proper vent placement | Ensures even airflow distribution |
| Avoid clutter near unit | Maintains optimal airflow |
| Regular cleaning | Keeps vents free from dust and debris |
Additionally, choosing high-quality car protection accessories can help maintain your system and surrounding area free from dust and debris, supporting optimal airflow. Regularly inspecting vent openings and ensuring they are unobstructed can further improve system efficiency. To maximize airflow, consider vent placement that allows for easy access and minimizes clutter around the unit. Paying attention to airflow patterns can also help optimize overall system performance. Moreover, ensuring that surrounding furniture does not block vents is crucial for consistent airflow.
Is Your Drainage and Refrigerant Line Properly Routed to Prevent Leaks?
Properly routing your drainage and refrigerant lines is essential to prevent leaks that can harm your mini split’s performance and cause water damage. Poorly routed lines can lead to drainage issues and refrigerant leaks, risking system efficiency and costly repairs. To avoid these problems:
- Ensure the drainage line slopes downward continuously to prevent water pooling.
- Keep the refrigerant line protected from kinks and sharp bends to avoid leaks.
- Route drain lines away from areas prone to freezing or debris buildup.
- Use proper insulation on refrigerant lines to prevent condensation and refrigerant leaks.
- Regular inspection and proper maintenance practices can help you stay diligent in maintaining proper installation practices.
- Additionally, understanding installation standards can help ensure your mini split is set up correctly from the start.
- Familiarizing yourself with local building codes can also prevent installation errors and potential legal issues.
Frequently Asked Questions
What Permits or Codes Are Required for Mini Split Installation?
You’ll need to check your local building codes and permit process before installing a mini split. Many areas require permits to ensure safety and compliance, especially if electrical work is involved. Contact your city or county building department to confirm specific requirements. Failing to obtain the necessary permits can lead to fines or issues if you sell your house later. Always follow the codes to make sure your installation is legal and safe.
How Loud Will the Mini Split System Be During Operation?
Your mini split system won’t sound like a jet engine, but noise levels can vary. Typically, indoor units operate quietly, comparable to a whisper, while outdoor units might generate some background noise. To keep sound levels low, guarantee proper sound insulation around the unit and choose models known for quiet operation. Proper installation also minimizes noise, making your space peaceful without any disruptive sounds during operation.
Can I Install a Mini Split System Myself or Need a Professional?
You can install a mini split system yourself, but beware of DIY challenges like handling refrigerant lines and electrical connections, which require specific skills. If you’re not comfortable with these tasks, hiring a professional is smarter to guarantee safety and proper setup. Consider cost considerations too—while DIY saves money upfront, improper installation can lead to costly repairs later. Weigh your skills carefully before deciding whether to install it yourself or call in an expert.
How Often Should I Schedule Maintenance for Optimal Performance?
You should schedule maintenance for your mini split system at least once a year to guarantee peak performance. Regular maintenance, including filter cleaning and checking refrigerant levels, helps prevent issues and keeps your system running efficiently. A maintenance schedule tailored to your usage can further enhance performance. Don’t skip these appointments, as consistent upkeep directly contributes to energy savings and prolongs your mini split’s lifespan.
Are There Energy Efficiency Considerations for Different Mini Split Models?
Think of mini split models as different engines; their energy efficiency varies. You want to choose one with high energy ratings, like a fuel-efficient car, to save money and reduce your environmental footprint. When comparing models, focus on their energy ratings and features. A well-chosen mini split not only cools or heats effectively but also operates like a well-tuned machine, ensuring you get the most bang for your buck while being eco-friendly.
Conclusion
Before you install a mini split, remember that preparation is key—an ounce of prevention is worth a pound of cure. Make sure your space, power, and airflow are all up to par, and never overlook proper drainage and placement. Skimping on these steps can lead to costly repairs and headaches down the line. As the saying goes, “A stitch in time saves nine,” so take the time to get it right from the start.