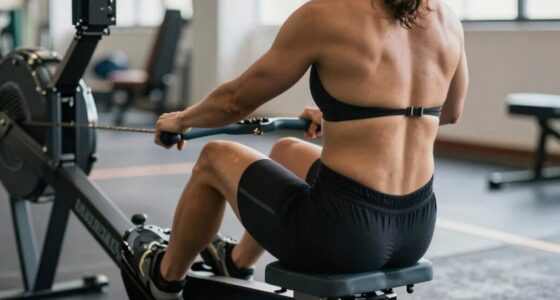
To prevent injury, position safety pins just below your lowest squat or deadlift range, and at chest or shoulder height for bench and shoulder presses. Use a measuring tape or level to set them accurately, ensuring they’re secure and aligned with your natural motion. Check and adjust regularly as your strength or routine changes. For more tips on maximizing safety and avoiding common setup mistakes, keep exploring additional guidance.
Key Takeaways
- Position safety pins just below your lowest comfortable squat or deadlift point to catch the bar safely.
- Set pins at chest level for bench press and slightly below shoulder height for shoulder exercises.
- Use measuring tools and markings for precise, consistent safety pin placement.
- Ensure safety pins are securely fastened and aligned with the barbell’s range of motion.
- Regularly inspect and adjust safety pin height as your strength and technique evolve.
Why Proper Safety Pin Placement Is Crucial for Safe Workouts
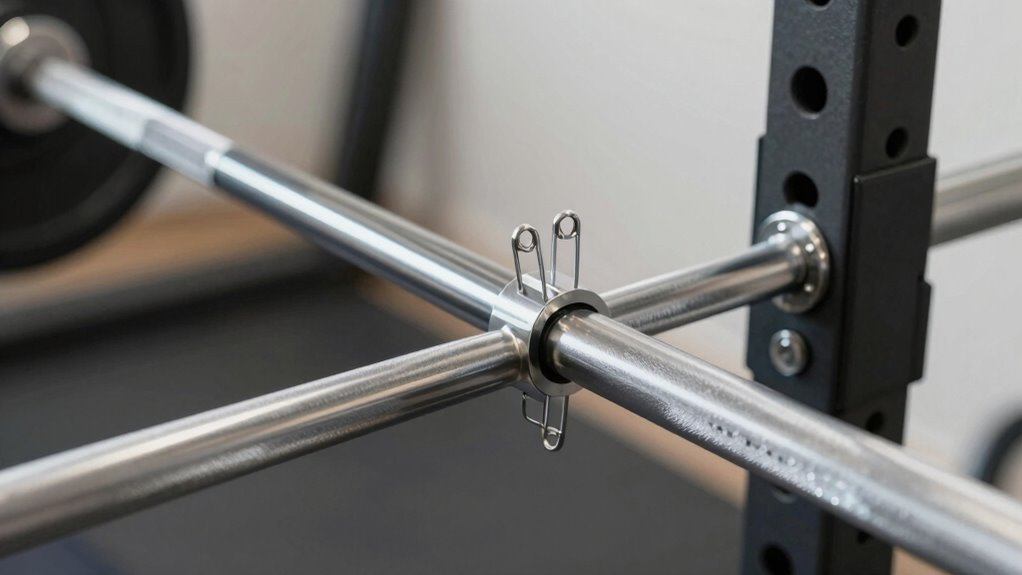
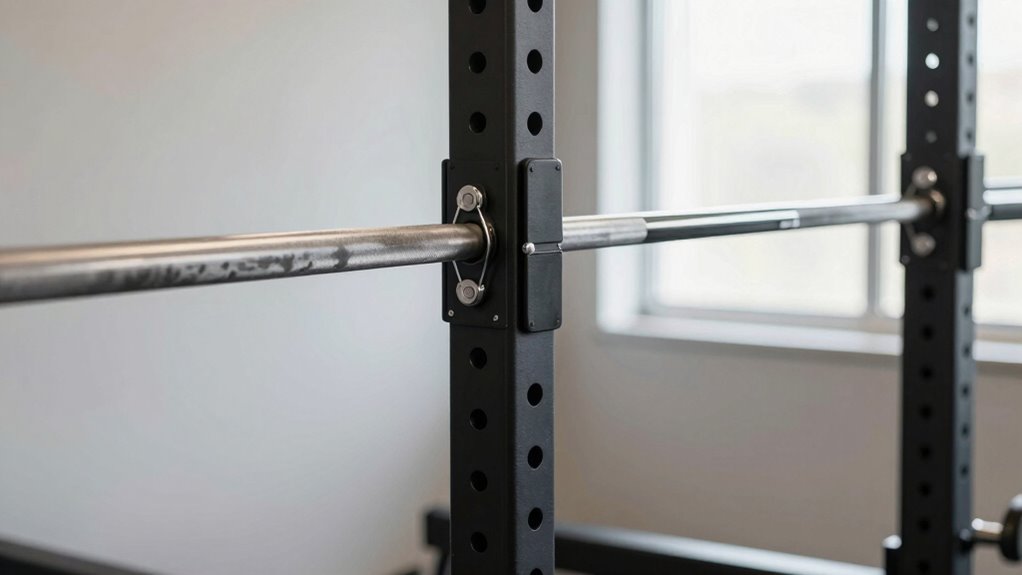
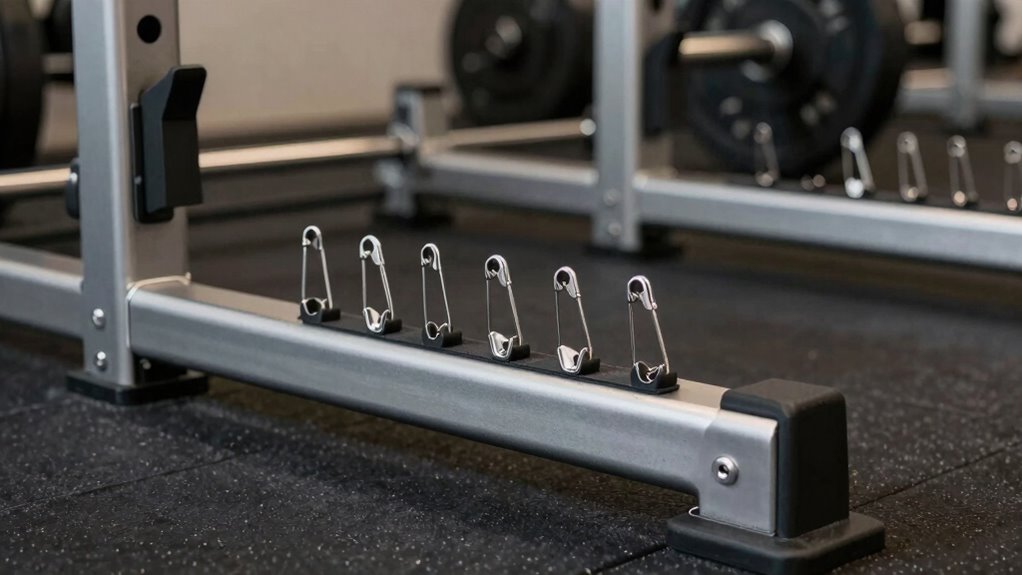
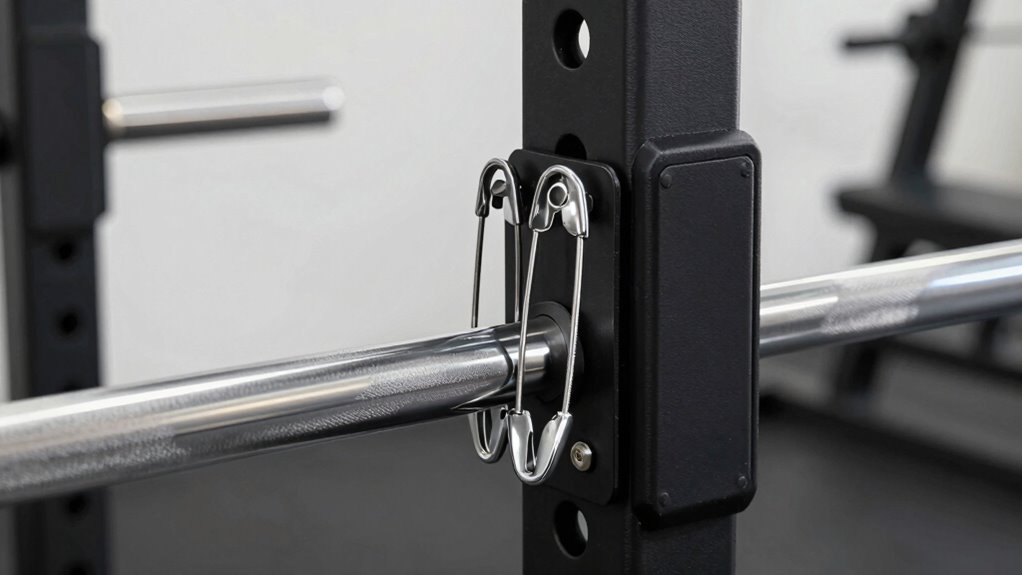
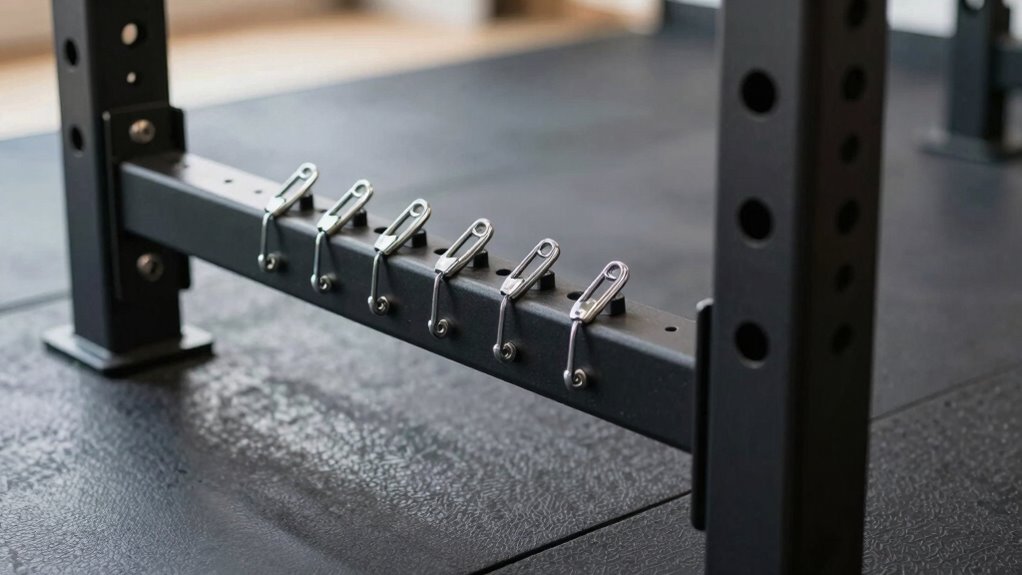
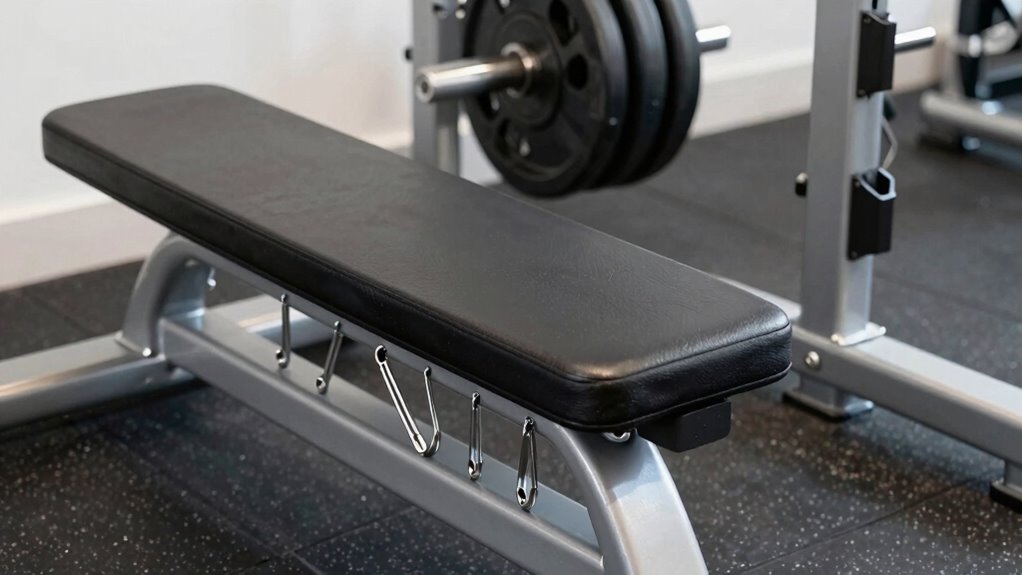
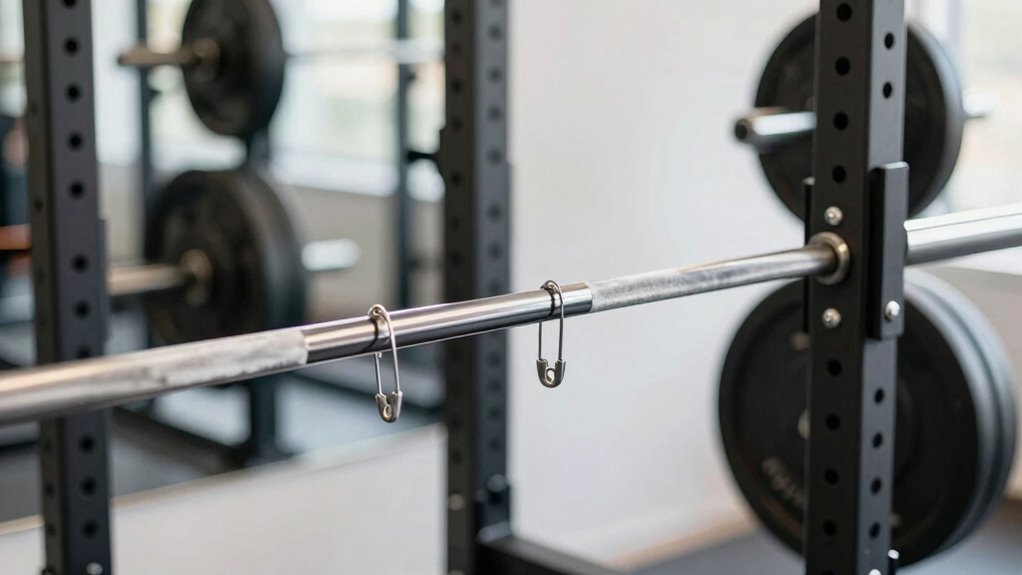
Proper safety pin placement is essential because it directly impacts your safety during weightlifting. When you set the safety pins correctly, they act as a reliable catch if you can’t complete a lift, preventing injuries. Spotter arms are often used alongside safety pins to provide extra security, especially during heavy lifts. Make sure the safety clips are securely fastened to keep the safety pins in place. Incorrect placement or loose safety clips can cause the pins to shift or fall, risking injury. Proper positioning ensures the pins are at the right height to catch the barbell without interfering with your movement. Taking the time to adjust safety pins and secure safety clips properly creates a safer workout environment, giving you confidence to lift heavier and push your limits. Additionally, understanding pressure washer maintenance routines can help ensure your equipment remains safe and reliable for your workouts. Regularly inspecting your safety equipment is also important to maintain optimal safety standards, and staying informed about equipment safety standards can help prevent accidents. Ensuring your safety gear is well-maintained and correctly used is a key part of kitchen gear care, which can be applied to your workout environment as well.
How to Measure and Set Safety Pin Heights for Squats and Deadlifts
To set your safety pin heights correctly, you need to determine the right level based on your body and lift type. Use a reliable measuring tape and proper equipment to guarantee accuracy. Once in place, test the safety measures by performing controlled reps to confirm they catch your weights effectively. Additionally, consider the smart lock systems available for securing your lifting area and ensuring safety from unauthorized access. Properly kitted-out safety features can further enhance your confidence during heavy lifts, especially when integrating home safety protocols to prevent accidents. Remember that consistent measurement is key to maintaining safety over time and adjusting for any changes in your lifting routine. Incorporating Free Floating techniques can also help prevent injuries by allowing more natural movement during lifts.
Determining Correct Height
Getting the safety pin height right is essential for safe and effective squats and deadlifts. To determine the correct height, follow these steps:
- Perform warm-up routines with lighter weights to gauge your natural lift position and identify where safety pins should be set.
- Use spotting techniques by practicing a few reps at different pin levels to find the safest spot for catching the bar if you fail.
- Adjust the pins so they’re just below your lowest comfortable squat or deadlift position, ensuring you can exit safely without risking injury.
- Remember that understanding proper growth mindset can help you approach weightlifting challenges with resilience and adaptability, reducing the risk of injury due to hesitation or improper technique. Additionally, paying attention to your body’s feedback can guide you in setting the most effective safety pin height for your individual needs.
Using Proper Equipment
Measuring and setting the safety pin height correctly is essential for safe and effective lifting. Using proper equipment, like sturdy exercise accessories, guarantees your safety during squats and deadlifts. Start by selecting safety pins that are adjustable and compatible with your power rack. Use a tape measure to determine the ideal height — usually just below your parallel squat position or just above your deadlift lockout. Properly positioned safety pins prevent injury if you lose control or fatigue during a lift. Incorporating these adjustments into your workout routines consistently helps reinforce safe lifting habits and proper technique. Knowing how to identify the correct safety pin height is crucial for adapting to different lifts and skill levels. Remember, the right safety pin height allows you to push yourself safely without risking strain or accidents, making your training more effective and injury-free. Understanding safety mechanisms in exercise equipment helps optimize your setup and minimize risks. Additionally, familiarizing yourself with power rack safety features can further enhance your security during heavy lifts. Ensuring your safety setup includes verifying adjustable safety pin functionality is crucial for adapting to different lifts and skill levels.
Testing Safety Measures
Before you begin lifting with safety pins, it’s important to verify they’re set correctly for your body and the specific lift. Properly testing safety measures guarantees your equipment maintenance is up to date and your workout routine remains safe. To do this:
- Stand in the power rack and perform a few practice reps with just the bar or light weights, checking if safety pins catch the bar at the right height.
- Adjust the safety pins so they stop the bar just below your lowest squat or deadlift position, preventing injury if you fail.
- Confirm the pins don’t interfere during the lift’s full range of motion, and re-test periodically as part of routine equipment maintenance. This keeps your safety measures reliable and effective.
- Regularly evaluate your setup to ensure the safety pins continue to provide optimal protection as your strength and technique evolve.
Finding the Right Safety Pin Position for Bench Press and Shoulder Exercises
Finding the right safety pin position is essential for safe and effective bench presses and shoulder workouts. You’ll want to adjust the pins to match your range of motion and prevent injuries. Proper appliance setup ensures your safety and optimizes workout performance. Selecting the correct gear and knife roundup can also help you make informed choices about your workout equipment and accessories. Additionally, understanding projector technology can help you choose equipment that aligns with your fitness space and viewing needs. Incorporating safety-conscious practices into your routine can further reduce the risk of accidents and injuries during training. To further enhance safety, it’s important to develop emotional skills that help you recognize and respect your physical limits during training. Let’s explore how to set the ideal safety pin height and some safety tips to keep in mind.
Optimal Safety Pin Height
How do you determine the best safety pin height for your bench press and shoulder exercises? Start by considering your natural range of motion and preferred barbell placement. The safety pins should be set so you can lift the bar off easily without compromising form or risking injury. Here are three tips to find the right height:
- Position the pins so the barbell is just below or at chest level for bench press, ensuring a smooth lift-off.
- For shoulder exercises, set the pins slightly below shoulder height to allow controlled movement.
- Use rack accessories to fine-tune the safety pin height, making adjustments easier and more precise. Additionally, understanding ergonomics fundamentals can help you optimize your setup for safety and comfort.
Adjusting Pins For Bench Press
Ever wondered how to set the safety pins for your bench press to maximize safety and efficiency? First, position the pins so they catch the bar just above your chest at the lowest point of the lift, preventing injury if you fail. Adjustments should consider your dumbbell calibration for balanced control and guarantee they’re high enough to avoid interference but low enough to prevent the bar from dropping. Use this table to guide your setup:
| Safety Pin Height | Purpose | Best For |
|---|---|---|
| Near chest level | Max safety during heavy lifts | Bench press, shoulder exercises |
| Slightly above | Allows full range of motion | Cardio safety, warm-ups |
| Higher position | Easy bar removal for lighter sets | Rehab or lighter workouts |
Proper pin placement reduces injury risk and improves workout flow.
Shoulder Exercise Safety Tips
Choosing the correct safety pin position is essential for safe and effective shoulder exercises and bench presses. Proper placement helps prevent injuries and ensures you can lift confidently. To optimize safety, focus on these tips:
- Adjust pins to just below shoulder height during shoulder presses to catch the bar if you lose control, maintaining proper lifting techniques.
- For bench presses, set pins slightly above chest level to avoid unnecessary strain and keep your workout safe.
- Combine your safety pin setup with good nutrition strategies—fuel your muscles properly to improve stability and recovery, reducing injury risk.
Always reassess your safety pin positions regularly, especially as you progress. Staying mindful of your lifting techniques and nutrition strategies maximizes safety and effectiveness in your workout.
Essential Tools and Tips for Accurate Safety Pin Adjustment

To guarantee your safety pins are positioned correctly, you’ll need the right tools and some practical tips. First, use a measuring tape or a level to ensure the safety pins are at the proper height for your exercise form. A marker or masking tape can help mark the exact pin placement before making adjustments. Always wear safety gear, like gloves, to protect your hands when handling the pins or adjusting the rack. When setting the safety pins, focus on maintaining proper exercise form by aligning the pins with your natural range of motion. Take your time to double-check the height from multiple angles. Accurate safety pin placement minimizes injury risk and ensures your workouts are both safe and effective.
Common Mistakes When Setting Up Safety Pins: and How to Avoid Them

Setting up safety pins incorrectly is a common mistake that can compromise your safety during workouts. These setup errors often lead to injuries or failed lifts. To avoid safety pin mistakes, be mindful of these common errors:
- Placing safety pins too high or low, which can cause instability or inadequate protection.
- Not securing safety pins tightly, risking them slipping or shifting during lifts.
- Ignoring proper alignment with the barbell, leading to awkward or unsafe positions.
Rechecking and Adjusting Safety Pins: When and How
Regularly rechecking and adjusting your safety pins guarantees they stay in the correct position and provide reliable protection during lifts. Safety pin maintenance is essential to ensure they catch the bar at the right height and prevent injury. You should review their placement after each workout or when changing exercises. Use proper adjustment techniques by loosening the pins, repositioning them so they align just below your weakest point in the lift, and then tightening securely. Always test their effectiveness with a light lift before heavy sets. If you notice any looseness or misalignment, readjust immediately. Proper safety pin maintenance and regular adjustments keep your power rack safe and functional, giving you confidence during every session.
Troubleshooting Safety Pin Issues During Your Workout
If you notice issues with your safety pins during a workout, addressing them promptly can prevent accidents and keep your session on track. Safety gear and proper workout attire are essential, but safety pins must also be functional. To troubleshoot safety pin problems:
- Check if the safety pins are securely engaged in the correct holes. Loose pins won’t provide adequate protection.
- Inspect for damage or bending that could compromise their strength. Replace damaged pins immediately.
- Ensure safety pins are aligned with your workout intensity and position. Adjust if they’re too high or low, which can interfere with your movement.
Always wear appropriate workout attire that doesn’t hinder access to safety gear. Quick troubleshooting keeps your workout safe and effective, preventing injuries before they happen.
Expert Tips for Optimizing Your Power Rack Safety Settings

To guarantee your power rack provides maximum safety during your workouts, you need to fine-tune its safety settings carefully. Start by adjusting safety pins to the correct height—just below your starting position—so they catch the bar before it drops too low. Proper equipment selection is vital; choose safety pins that are sturdy, easy to adjust, and compatible with your rack. When adjusting safety pins, ensure they’re secure and level on both sides to prevent imbalance. Consistently check that safety pins aren’t loose or worn, as this can compromise safety. Properly adjusted safety pins give you confidence during heavy lifts, allowing you to push your limits without risking injury. Regularly inspecting and fine-tuning these settings keeps your power rack safe and effective for every session.
Final Safety Checks Before Starting Your Workout
Before you start lifting, it’s essential to perform final safety checks to guarantee everything is secure and properly set up. First, verify your safety pins are correctly positioned at the right height, ensuring they’ll catch the bar if needed. Second, inspect your equipment maintenance—look for any loose bolts or wear that could compromise safety. Third, review your spotting techniques; even if you’re confident, having a spotter or knowing how to spot yourself ensures added protection. Double-check that the barbell is properly loaded and balanced. These steps help prevent injury by confirming your safety setup is ideal before lifting. Taking these precautions minimizes risks and ensures your workout stays safe and effective.
Frequently Asked Questions
Can Safety Pins Be Adjusted During a Workout?
Yes, you can adjust safety pins during a workout, but it’s best to do so sparingly. Regular adjustment frequency isn’t recommended because it can disrupt your rhythm. Use proper safety pin techniques, like ensuring they’re securely positioned before lifting, to prevent injury. Only make adjustments when necessary, such as if your workout plan changes or you need different support levels, and always double-check their stability before continuing.
What Safety Pin Material Is Most Durable?
You should choose safety pin materials like steel for maximum durability, as they withstand heavy use and weight drops. During durability testing, steel safety pins consistently outperform aluminum or plastic options, proving their strength and longevity. By selecting high-quality steel safety pins, you guarantee your power rack remains safe and reliable over time. Always check durability ratings and manufacturer specifications to confirm you’re getting the most durable safety pin for your workout needs.
How Often Should Safety Pins Be Inspected?
You should inspect safety pins at least once a month to guarantee proper safety pin maintenance. Regular inspection frequency helps catch signs of wear, corrosion, or damage early, preventing potential injuries. During each check, look for cracks, bending, or corrosion, and replace any compromised pins immediately. Keeping safety pins in good condition guarantees they function effectively when needed, maintaining your safety during every workout session.
Are There Different Safety Pin Setups for Beginners?
Yes, there are different safety pin setups for beginners. You can use safety pin alternatives like rubber bumpers or adjustable safety bars for added security. As a beginner, always follow safety tips such as positioning safety pins at the right height and checking them regularly. These setups help prevent injuries by providing reliable support during lifts, making your workout safer and more comfortable as you build strength and confidence.
Can Safety Pins Prevent Injuries in All Types of Lifts?
Safety pins are like a safety net, catching you before a fall. They can prevent injuries in most lifts when correctly positioned. Proper safety pin positioning is vital, especially during heavy or complex lifts, to act as an injury prevention technique. However, they might not cover all risks, particularly with dynamic or unconventional movements. Always combine safety pins with proper form and spotters for maximum injury prevention.
Conclusion
Think of your power rack as your fortress—proper safety pin placement is your shield against injury. By taking the time to measure, adjust, and double-check, you’re channeling the wisdom of Hercules himself, ensuring your workouts are powerful yet safe. Remember, even the strongest warrior needs a sturdy defense. Stay vigilant, fine-tune your safety pins regularly, and conquer your lifts with confidence—your safety is the ultimate victory.