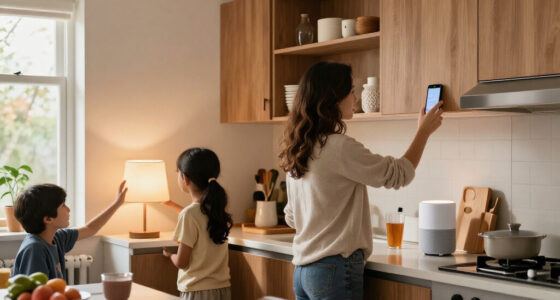
This guide helps homeowners and renters choose camera locations, install smart home security cameras, connect them to Wi-Fi, set recording and alerts, and verify that the system works. No networking or installation experience is required; you will need basic phone and app skills. Allow 1-3 hours for planning and setup, with more time if you need to run cables, mount several cameras, or improve Wi-Fi coverage.

Get home appliances delivered free with Prime
- Fast, free delivery on millions of items
- Prime Video, Amazon Music and more included
- Member-only deals all year

Blink Outdoor 4 Wireless Smart Security Camera System (5 Cameras)
- ✔ Camera count: 5
- ✔ Camera resolution: 1080p HD
- ✔ Field of view: 143° diagonal
Blink Outdoor 4 Wireless Smart Security Camera System, 3 Cameras, 2-Year Battery Life
- ✔ Camera count: 3
- ✔ Video resolution: 1080p HD
- ✔ Night vision: Infrared
Blink Outdoor 4 Wireless Smart Security Camera System (2 Cameras, Sync Module Core)
- ✔ Camera count: 2
- ✔ Video resolution: 1080p HD
- ✔ Night vision: Infrared
Difficulty: Beginner | Time: 1-3 hours
What You’ll Need
Tools & Materials:
- Smart security camera or cameras and included power adapters
- Smartphone or tablet with the camera maker’s app installed
- Home Wi-Fi name and password
- Ladder, drill, screwdriver, and mounting hardware if installing cameras high up
- Pencil and measuring tape for planning mount positions
- Optional: Ethernet cable, outdoor-rated cable clips, or a Wi-Fi range extender
Knowledge:
- Basic use of a smartphone and app
- Ability to connect a device to a home Wi-Fi network
- For wired cameras: basic comfort using hand tools and identifying a safe mounting surface
Check whether each camera supports your Wi-Fi band, operating system, smart-home platform, and recording method before opening or mounting it. Many cameras use 2.4 GHz Wi-Fi; some support 5 GHz or both. Check the manufacturer’s instructions for power, weather ratings, and mounting limits. Ask a landlord or property manager before drilling, and check local rules before recording areas beyond your property. Do not mount equipment where drilling could hit electrical wires, pipes, or structural supports.
Blink Outdoor 4 Wireless Smart Security Camera System (5 Cameras)
When our priority is watching several sides of a property, this five-camera kit is the most capable choice in the lineup. Five wireless cameras give us more flexibility to cover entrances, a garage, a yard, or a side passage than either the three-camera or two-camera bundle. Because the core camera features are shared across all three products, the reason to choose this one is coverage capacity, not a higher video resolution or a more advanced camera.Each unit offers 1080p live view, infrared night vision, two-way audio, and a 143-degree diagonal field of view. The system is designed for battery-powered placement, with up to two years of life claimed from two AA lithium batteries per camera. That can reduce the need to route power outdoors, though actual battery life will depend on activity and use. Enhanced motion detection and optional person alerts add useful notification tools; the latter should not be mistaken for a free included feature.Compared with the three-camera set, this kit can address more areas without buying another bundle, but its extra reach comes with more setup and more devices to manage. Compared with the two-camera option, it is a better fit for a larger property, yet excessive for a small space where two viewpoints are enough. The most important caveat is common to the whole range: Sync Module Core does not include local storage. Cloud storage requires a subscription after the trial, and local storage calls for optional accessories. We should choose the five-camera kit for its coverage, not assume that its larger bundle solves storage costs or subscription preferences.
Pros:
- Five cameras provide the broadest coverage in this comparison.
- 1080p live view, infrared night vision, and two-way audio are included across the system.
- Battery-powered placement avoids requiring a wired power connection at each camera location.
- Compatible with Alexa and includes enhanced motion detection.
Cons:
- Sync Module Core does not include local storage; additional accessories are needed for that option.
- Cloud storage requires a subscription after the included trial, and person alerts require a subscription.
- Five cameras take more time to position and manage than the smaller kits.
Best for: Households that want to monitor several entrances and outdoor areas with one wireless camera system and use Alexa.
Not ideal for: Small homes needing only one or two viewpoints, or buyers who require included local recording and do not want optional storage accessories or a subscription.
Bottom line: We recommend the five-camera kit when wider property coverage matters more than keeping installation and camera management minimal.
“We recommend the five-camera kit when wider property coverage matters more than keeping installation and camera management minimal.”
Blink Outdoor 4 Wireless Smart Security Camera System, 3 Cameras, 2-Year Battery Life
The three-camera kit is the practical middle choice for buyers who want more than a basic entrance setup but do not need five separate views. We can use the extra camera to add a second side of the home, a detached area, or another approach to an entrance. Its appeal is straightforward: more flexible coverage than the two-camera set, with less installation and device management than the five-camera bundle.On the camera side, we get the same central features as the other kits: 1080p HD live view, infrared night vision, two-way audio, and Alexa support. The stated battery life is up to two years, and the wireless design helps when camera locations lack convenient outdoor power. Enhanced motion detection can help identify activity, but the supplied details say person detection requires an optional subscription. Buyers should also plan around Sync Module Core’s storage limitation rather than assume footage can be saved locally out of the box.Compared with the five-camera system, this bundle asks us to prioritize which three areas matter most. That is a sensible compromise for many homes, but it cannot provide the same number of simultaneous viewpoints. Against the two-camera kit, it offers more placement options at the cost of mounting and maintaining one additional camera. Since all three sets use the same basic camera platform, the decision is about scale, not a unique imaging or smart-home advantage. This is the strongest fit when we want a useful coverage step up without buying the largest kit.
Pros:
- Three cameras offer a useful coverage step up from the two-camera kit.
- 1080p video, infrared night vision, and two-way audio match the core features of the larger bundle.
- Wireless installation and the up-to-two-year battery-life claim suit locations without nearby power.
- Works with Alexa for compatible voice-control routines.
Cons:
- Three viewpoints may not cover a larger property as comprehensively as the five-camera kit.
- Local storage is not included with Sync Module Core and requires optional accessories.
- Person detection requires an optional subscription.
Best for: Homeowners who need a front entrance plus two additional camera positions and want a middle-sized system.
Not ideal for: Buyers who need to monitor many separate zones, or those who prefer the smallest possible setup and can cover their needs with two cameras.
Bottom line: We would choose this three-camera bundle when two views feel limiting but five would be more system than our home needs.
“We would choose this three-camera bundle when two views feel limiting but five would be more system than our home needs.”
Blink Outdoor 4 Wireless Smart Security Camera System (2 Cameras, Sync Module Core)
For a first camera system—or a home with just two priority locations—the two-camera kit is the least demanding way into the Blink Outdoor 4 range. It can put one camera at a main entrance and another at a secondary approach, without asking us to find mounting spots for three or five devices. That makes it the clearest pick for buyers who value a compact starting setup over maximum coverage.The feature set remains familiar: 1080p HD video, infrared night vision, two-way audio, and Alexa compatibility. Wireless cameras make placement simpler when running power is impractical, while the stated battery life is up to two years. The system also supports enhanced motion detection. However, person alerts require a subscription, and the Sync Module Core does not include local storage. The supplied details describe cloud storage with a 30-day free trial and local storage through optional accessories, so storage preferences should be part of the decision before we install the cameras.Compared with the three-camera kit, this bundle is easier to keep focused on a couple of high-priority zones, but it gives us less room to cover a side entrance or yard as well. The five-camera system is the obvious choice for broader surveillance; we should not pay in complexity and coverage capacity we will not use. On the other hand, if we already know we need three or more viewpoints, starting here may mean expanding later. Choose this version for simplicity and a two-camera plan, not because its camera features outperform the other bundles.
Pros:
- Two cameras make placement and day-to-day system management more straightforward.
- Includes 1080p video, infrared night vision, and two-way audio.
- Battery-powered design can simplify installation where outdoor outlets are unavailable.
- Alexa compatibility supports use within a compatible smart home.
Cons:
- Two cameras provide the least coverage of the three kits.
- Sync Module Core does not include local storage; optional accessories are needed for local storage.
- Person alerts require a subscription, and cloud storage requires a subscription after the trial.
Best for: First-time smart-camera buyers, renters, or smaller households with two clear locations to monitor.
Not ideal for: Homes that need three or more camera positions, or buyers who want included local storage and subscription-free person alerts.
Bottom line: We recommend the two-camera kit when a simple, limited-coverage setup is more valuable than adding viewpoints we may not use.
“We recommend the two-camera kit when a simple, limited-coverage setup is more valuable than adding viewpoints we may not use.”
As an Amazon Associate we earn from qualifying purchases.
Before You Start
Decide what you need the cameras to do: watch an entry, receive motion alerts, record continuously, or check on a pet. Choose only the views that support that purpose. Avoid pointing a camera into a neighbor’s home or private space, and keep indoor cameras out of bedrooms and bathrooms. Review the camera maker’s account security and storage terms. If you use cloud storage, find out whether a subscription is required and how long clips remain available. Keep a phone handy during setup and use a unique password for the camera account.
Step-by-Step Instructions
Step 1: Choose the areas to monitor
Walk around your home and mark the specific entrances or shared areas you want to monitor, such as the front door, garage entrance, or a living-room doorway. Prioritize locations where a person or package would be visible, rather than trying to watch every room. Check the view from both inside and outside, and avoid capturing neighboring windows, public areas, or places where household members expect privacy.
Tip:For an entry camera, check whether the image can show a person’s face and packages without being blocked by an open door, plants, or a porch overhang.
Check: You have a short list of camera views, with a clear reason for each one and no unnecessary private-area coverage.
Step 2: Check power, Wi-Fi, and recording needs
Read the product specifications and confirm how each camera receives power: battery, plug-in adapter, or wired supply. Confirm the Wi-Fi band and signal requirements, then check whether your router reaches each planned location. Decide whether clips will save to a memory card, a hub, or cloud storage. Review any subscription costs, clip retention limits, and account requirements before installation.
Tip:Test Wi-Fi at the intended camera location with a phone. A weak signal on the phone may also cause camera delays or dropped connections, though the camera’s antenna and network needs can differ.
Check: Each location has a practical power plan, a usable network connection, and a known way to store or review recordings.
Step 3: Create and secure the camera account
Install the official camera app from your phone’s app store, create an account, and use a unique password that you do not use elsewhere. Turn on two-factor authentication if available. Update the app and read the privacy and storage settings. Do not share account credentials with household members; invite them through the app’s access-sharing feature when available.
Tip:Use the manufacturer’s official app and support pages. Avoid scanning setup codes or installing apps from links in unsolicited messages.
Check: You can sign in to the official app, and account protection options are enabled or reviewed.
Step 4: Add and update each camera
Power on one camera at a time and follow the app’s instructions to add it. Scan the setup code or enter the device details only inside the official app. Connect the camera to the required Wi-Fi network and wait for the app to confirm pairing. Install any available firmware update before mounting the camera; keep power connected until the update finishes.
Tip:If setup asks for a 2.4 GHz network, select that band. Some routers combine 2.4 GHz and 5 GHz under one network name; follow the camera maker’s advice if pairing fails.
Check: The camera appears online in the app, shows a live view, and has completed any required firmware update.
Step 5: Test the view before mounting
Hold the camera at the planned height and angle, then check the live view in the app. Adjust the position so the intended entry or area is visible and the image is not washed out by a bright window or direct light. Test the view with the door open and closed, and check the picture after dark if the camera has night vision. Confirm the camera can still connect at that position.
Tip:Do not aim directly at a bright light source; glare can hide the area you need to see. Use the app’s privacy zones or masking controls to block neighboring property when supported.
Check: The live view covers the intended area, avoids unwanted private spaces, and remains connected in the proposed position.
Step 6: Mount the camera securely
Follow the included mounting instructions and use the correct anchors and screws for the wall or ceiling material. Mark the holes, check the area for hidden wiring or pipes, and drill only if the location is safe and permitted. Attach the bracket, secure the camera, and route its cable so it cannot be pulled, pinched, or exposed to water unless rated for outdoor use. For a battery camera, install or charge the battery as directed.
Tip:Use only the supplied power adapter or a compatible adapter specified by the manufacturer. Keep indoor-only cameras and power supplies protected from rain and condensation.
Check: The camera and bracket do not wobble, cables are protected, and the camera remains online after mounting.
Step 7: Set motion, recording, and privacy options
In the app, set the camera’s name and time zone, then choose the recording mode and clip-retention options. Set motion sensitivity to a moderate level, draw activity zones around the areas you want monitored, and exclude roads, trees, or other sources of repeated movement. Configure privacy zones, microphone, and notification permissions to match your household’s needs. Check whether recording audio is legal where you live before enabling it.
Tip:Start with fewer alerts and narrower activity zones. You can widen the zones or raise sensitivity after testing if important movement is missed.
Check: The camera records or alerts according to the selected settings, and excluded areas do not trigger alerts where the app supports exclusions.
Step 8: Test alerts and review a recording
Walk through the monitored area and confirm that the camera detects the movement and sends an alert to the intended phone. Open the notification, review the clip, and check that its timestamp and image are clear. Test at the times and lighting conditions that matter, including after dark. Ask another household member to test their invited access if you have shared the camera.
Tip:Keep your phone’s notification permissions enabled for the camera app. If alerts arrive late, check both app settings and the phone’s battery or background-app restrictions.
Check: You receive a relevant alert, can open a usable recording, and can access the camera from the household accounts you intended to authorize.
Common Mistakes to Avoid
- Recording neighbors or private areas without checking privacy settings and local rules. — Aim cameras at your own property, use privacy masking where available, and check local recording requirements.
Troubleshooting
Problem: The live image is dark, blurry, or obscured at night.
Solution:
Clean the lens with a soft, dry cloth and adjust the angle to reduce glare from windows or reflective surfaces. Check night-vision settings and remove nearby objects that block infrared light. Confirm that the camera’s night view works from its mounted position.
What Success Looks Like
The setup is complete when every camera stays online in its installed position, shows the intended area without unnecessary private coverage, and records or sends alerts as configured. A test walk should produce a relevant notification and a viewable clip with a readable timestamp. Confirm that the chosen storage method works, authorized household users can access the camera, and account protections such as a unique password and two-factor authentication are active where supported.
Next Steps
Review alerts and saved clips during the first few days. Adjust zones or sensitivity if you see repeated false alerts or missed activity. Check camera power, lens cleanliness, Wi-Fi status, storage availability, and firmware updates on a regular schedule. Replace or recharge batteries before they run low, and test alerts again after changing network, phone, or recording settings. Remove access for people who no longer need it, and review privacy settings whenever household needs change.
Frequently Asked Questions
Do smart security cameras need Wi-Fi?
Most smart cameras need Wi-Fi for app setup, live viewing, and remote alerts. Some record locally when internet access is unavailable, but remote access may stop until the connection returns. Check the specific model’s offline recording behavior before relying on it.
Where should I put an outdoor camera?
Choose a permitted position that shows the entry or area you want to monitor and can receive reliable Wi-Fi and power. Follow the manufacturer’s height and weather guidance, protect cables, and avoid pointing into neighboring private spaces.
Can I use smart cameras without a subscription?
That depends on the camera. Some offer local recording to a memory card or hub without a monthly plan; others limit saved clips or features unless you subscribe. Check storage and retention details before buying or completing setup.
How can I reduce false alerts?
Adjust the activity zone to cover only the area of interest, lower motion sensitivity, and use person or vehicle detection if available. Test the new settings by walking through the area and review alerts over several days.
How do I share camera access with family?
Use the app’s invitation or household-sharing feature and assign only the permissions each person needs. Avoid sharing your account password, and remove access when someone no longer needs it.
Halloween Picks
halloween
As an affiliate, we earn on qualifying purchases.